Trails for everyone, forever

Home Go Outside Trail Smarts Gear Fix it up, wear it out: clean or fix your essential pieces of hiking gear

Fix it up, wear it out: clean or fix your essential pieces of hiking gear

Gear can be pricey, but it's essential to keeping you warm, safe and dry when you step outside. When it fails, don't replace it; fix it! Get tips on mending holes, re-waterproofing, and learn just how much you can fix before you need to buy new. | By Anna Roth and Kay Sadowitz

Outdoor gear products are marketed to us as weather-proof, dirt-proof, LIFE-proof. While these products are indeed durable, without regular care and cleaning they won’t serve at their peak performance.

And when a piece of gear breaks, it can be frustrating; it's expensive to replace gear!

But gear can be fixed more often than you may realize.

We asked local mender, maker and repairist Kay Sadowitz to outline solutions for common gear damage, including what (and how) you can DIY and when to get a pro's help.

She has years of experience repairing and altering or modifying gear for her clients (WTA staff among them) in order to extend the life of the gear they rely on. One reason she recommends consulting pros:

"A repairist can not only repair your gear, they can answer questions about gear quality or make suggestions to improve your comfort. If a person made it, a person can work with you to fix it!"

Kay (like us) also encourages renting or borrowing gear rather than buying if you're trying something out for the first time. It's a good way to save money and resources.


Mend tears or holes

Here in the Northwest, jackets are a favorite piece of clothing on and off trail, resulting in a fair amount of wear and tear. But other gear can get holes, too! If your favorite waterproof or down item gets a hole in it, you can likely patch it. If a midlayer or wool sweater rips, try your hands at patching (or darning, if you're crafty). Tears or larger holes should be addressed by a repairist.

Do it yourself

  • Waterproof or water-resistant materials: Small holes can be mended with pre-cut adhesive patches with rounded corners, which you can buy or make yourself. If purchasing, look for Tenacious Tape or cute NoSo brands. The rounded corners help the adhesive stay stuck to the item. Just clean and dry the items and apply!
  • Down: Since the fabric used with down is very thin, it’s common for feathers to poke through seams or the fabric itself. You don't need to patch these, but if you get a large hole (from say, a stray ember) you can patch it as described above.
  • Wool or other textile: Try sewing a rip together, attaching your own fabric patches, even darning a hole! (This is a bit advanced, so unless you're already adept at sewing, finding a repairist might be your best bet.)

Find a repairist

  • Waterproof items: While patches work just fine in a pinch, they won't last forever, and you’ll want professional help if it’s a waterproof item. If you tear a hole in a waterproof jacket (see box) or a seam breaks, a repairist can sew a patch or stitch seams and add waterproof seam tape. 
  • Down: A repair specialist can re-fill small areas if a down item is losing feathers.
  • Wool or other textile: Repairists can also mend and patch other technical layers like fleece, softshell, synthetic puffies, wool and more.

Down or Fleece? A note on insulating layers

Down tends to keep you warmer with fewer layers, but is harder to clean. Synthetic can require more layering, but is easier to clean. Dig into the debate between feathers and synthetics in this article. Once you've decided what you need, remember to look for used items rather than buying new!
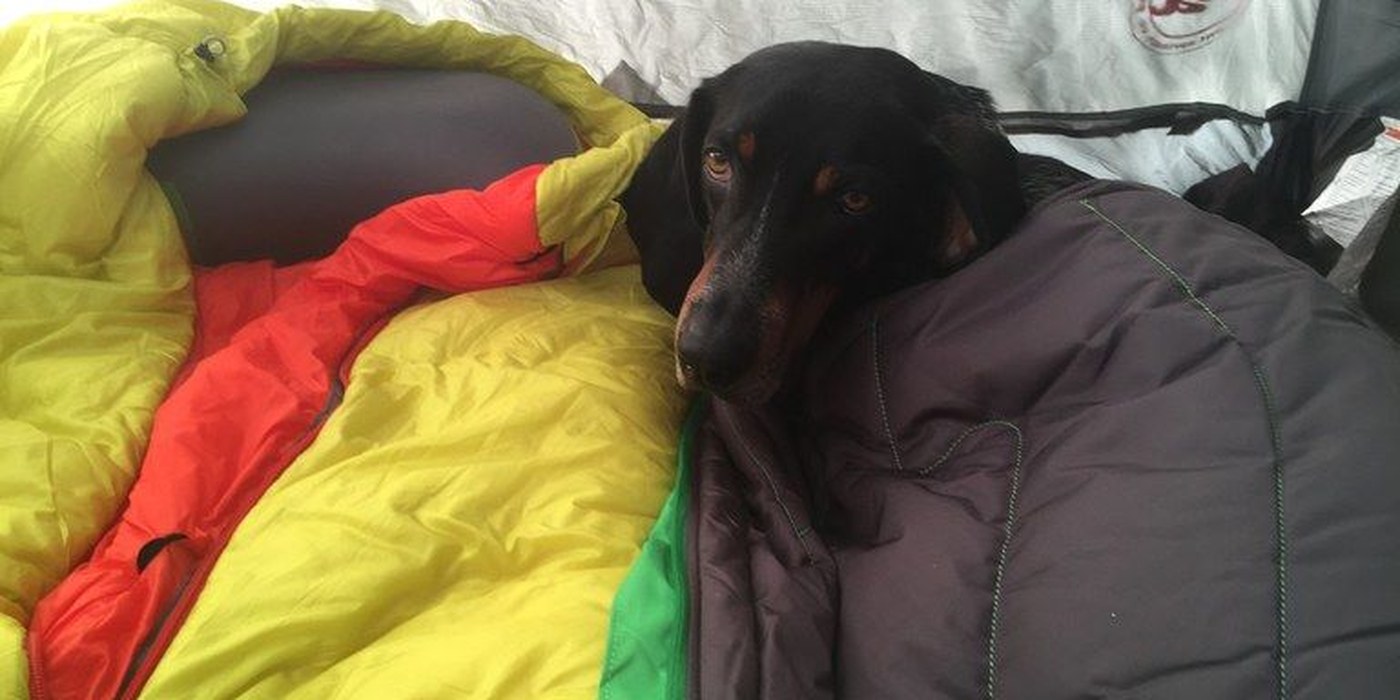
A small black chihuahua peeks out from between a black synthetic sleeping bag and a red, yellow, and green down bag. Down (left) or synthetic (right) sleeping bags can both serve — it just depends on your personal temperature. Photo by Vickie Wallace.


Restore your gear's waterproofing

Waterproof garments are made by sealing together several very thin layers of material. The combination of frequent use and exposure to sweat, dirt, body oils, sunscreen or bug spray can cause those layers to separate or cause the waterproof seam tape to peel.

Prevent this deterioration by washing these garments with the correct cleaner (like Nikwax or Gear Aid) and reapplying the durable water repellancy (DWR) once a season. The special wash and DWR may seem pricey, but it’s better for your wallet and the environment than buying a new rain jacket every year! Still looking for that perfect rain jacket? Let us help you find one.

Do It Yourself

Before you get started, don't use regular laundry detergent! It has chemicals in it that can cause further damage to the fabric. 

  • Wash your garment with a product made specifically for cleaning outdoor clothing, such as NikWax’s Tech Wash.
  • After your garment is clean, apply DWR at home, being sure to follow the instructions! Some DWR products must be heat-set in the dryer; some set at room temperature.

Find a repairist

If you tear a hole in a waterproof jacket or a seam separates, a repairist can sew a patch or stitch seams as well as add waterproof seam tape. See the section above for mending holes and tears.

A group of several volunteers stand in front of a tunnel wearing rain coats
Having good rain gear is crucial for fun on a work party or on a hike! Photo by Joshua Orendorf.


Caring for down

As ducks and geese know, feathers need to be cleaned regularly in order to function properly. The warmth in down comes from the spaces (called loft) between the feathery tendrils, which hold heat in small air pockets. Loft helps birds stay warm and dry in the freezing cold, and it lets you stay warm in your favorite down item. 

So how do you channel this avian magic? By cleaning it, a lot more than you probably think you need to.

A sleeping bag should be washed about once a season if you backpack regularly (about 2x a month) because the down gets dirty, sweaty or wet from condensation, and that causes the down tendrils to get soiled and limp. Yick.

The down side of down items is that they are thin and prone to melting when exposed to heat. Drying in a commercial dryer is best, but can be time-consuming at the proper temperature.

Kay recommends going to a repairist if you're washing a sleeping bag: "The big dryer drum is what is really necessary to get sleeping bags nice and lofted." And if you have the space, store your sleeping bag loose. Long term compression can cause down to deteriorate quickly.

Do it yourself

If you have a fair amount of spare time and you’re feeling ambitious, you can wash your down gear (like jackets or vests) yourself.
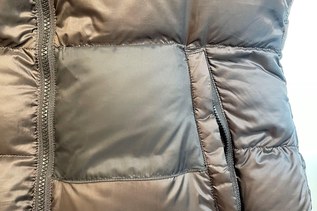
  • Always use a down-proof cleaner (never use regular detergent).
  • Fluff it in the dryer (but be sure it’s not too hot!)

Find a Repairist

  • Laundromats are dicey places for down gear, since residual detergent and mystery cleaners can hang out in the washers there. Especially if you don’t have access to a personal washer and dryer, have a professional clean your down items for you.
  • If you do find yourself with a melted mess from a DIY attempt, see a repair specialist for a sewn patch job and a refill of down. 

A close-up on a gray down jacket with a patch near the left pocket.Trail Smarts: Keep it clean, let it breathe

— Cleaning and storing your gear properly is important to ensuring it performs as long as you need it to.
— Here are some products we rely on to get our gear in good shape each year.
— Tips and equipment you may want to adopt to keep your camp extra clean this season


Clean shoes = happy feet

Should you get leather boots that fit to your feet? Mesh trail runners to let them breathe? Zero-drop? A high ankle boot? Finding the perfect shoe can take a while, so once you do, you'll want to keep them in great shape. There's likely no need to get rid of them just because of some small damage.

Do it yourself

  • Most holes, nicks and dings on the surface of a shoe can be sewn shut or repaired with shoe-glue or even tent seam sealant. 
  • Replace broken laces with sturdy new ones if a shoe has worn out. If the laces are good, save them for your next pair! Shoes uncomfortable? Try re-lacing them to alleviate foot strain.
  • Clean them! And be sure they fit right:
    • Leather boots need to be washed and re-treated about once a season, more if they’re repeatedly getting wet and drying out. Otherwise the leather will crack, letting in water or detaching from the soles.
    • Trail runners should be cleaned as well. Let dirt dry, then brush it off with a cloth or your hand or even a couple good whacks against each other to get the debris off. You can do this at the end of your drive home.
    • We've also got tips on deodorizing boots and insoles.

Find a Repairist

  • If your tread wears thin or the lugs on the bottom of your boots flatten out, consult a cobbler (listed in our resources below). They will be able to repair many hiking or climbing boots, as well as clogs or Birkenstocks, if you like to wear those after hiking. 
  • A repairist may also be able to customize a shoe (like a ski boot) to help your foot fit more comfortably.

Fix zippers

Contrary to popular belief, zippers can be repaired (sometimes)! But you should almost always consult a repairist if you need a zipper fix. There are tons of brands, models, shapes and sizes of zippers, and finding the right match can be time-consuming or confusing. Forcing the wrong slider onto a zipper can cause it to fail faster, and trying to repair something using glue is going to make a huge mess.

The kind of damage can determine what kind of repair you will need.

1

Zipper sometimes works and sometimes splits open

You may need a new slider (the part that slides and connects the two sides of the zipper together). The mechanism inside it can wear out over time. 

2

The teeth on the zipper are bent, poking out or the stitching along the zipper is fuzzy

A new slider may help, but you will likely need a zipper replacement now or very soon.

3

There is damage to the box and pin (or two pins) at the very bottom of the zipper

A full replacement is necessary.

4

Everything looks ok but there is still something wrong with it

Bring it to a repairist and they can help you troubleshoot. A new zipper is a worthwhile fix on a good garment and can help it last for years

Three images of a zipper that correspond with the above three described zipper problems
Common zipper problems include: A zipper that occasionally comes apart; fraying fabric around the zipper or broken teeth; wear and tear on the box and pin. Photos courtesy Kay Sadowitz.

Do it Yourself

There’s one zipper fix you can do at home; if your zipper looks to be in good shape overall but is a bit sticky, try a zipper lubricant or cleaner. This is especially useful on tents. 

How to: Goop a little bit of the lubricant on the zipper and brush it in with a toothbrush all along the zipper. This will help dislodge debris. Run the sliders through the zipper and lubricant a couple times, then use a clean rag to wipe off the excess goop along the entire zipper. If this doesn't work and your zipper is still crunchy, bring it to a repairist to help you with other options.

Fixing your gear

backpack.jpgBackpacks

With zippers and straps, there are a couple of ways things can go sideways in the backcountry. You can reattach a broken strap with some dental floss and a needle (being cautious about poking your fingers!)

If your zipper separates from the fabric, safety pins will help you keep it closed. Of course, be sure to have a sewist fix damage like that once you’re back home (see photo to the right).

Find a repairist for custom work

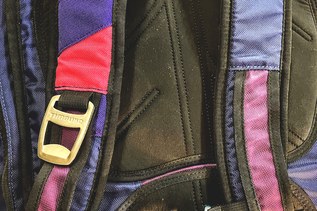
One of Kay's favorite backpack hacks is to replace your shoulder straps (see photo). You can do this if you need a different fit, or if the original straps fail entirely. "It's a great repair, and REI often sells just straps on their outlet or Re/Supply. People can also get a pack at a thrift store and salvage the straps off of it."


Tents

First off, keep them clean!

  • After any trip, especially a dusty or wet one, shake out your tent and if possible, rinse with water using a hose or a shower, then air dry it completely on the balcony, in your bathroom or backyard before storing it.
  • Get a spray-on waterproofing product or solar wash. UV rays cause tent fabrics to dry out and get brittle, meaning your tent could rip or leak in the backcountry unexpectedly.
    ** If you have a tent made of Dyneema or other specialized material, we recommend consulting the manufacturer before using UV spray. It  likely won't do any damage, but these specialized materials may not need UV spray. **

Do it yourself

  • Small holes in your tent fly can be fixed with a quick Tenacious tape patch but once you get back home, call up a sewist and get a sewn patch.
    Kay also says, "Tent mesh doesn't fray and isn't as delicate as it looks — if you have a hole of any size, it's not going to get bigger unless you pull on it or your dog pokes their way through it."
  • Use tent sealant to repair small punctures, ember holes or corners of tents where seam tape is beginning to peel. Tent sealant is good for holes in the floor of a tent as well. 

Find a repairist

  • Zippers can also be replaced on tents. Many ultralight tents have very small zippers that fail easily. These can be replaced at the same size or one size bigger to be more durable. 
  • Hole in your tent? A repairist can sew a patch and add seam tape to make it fully waterproof. When your tent is clean, seam tape sticks better. 

Move on

If you find your tent seam tape peeling throughout the tent, the fabric of your tent getting sticky, stinky, flaky or paper thin, or despite your re-proofing efforts it is still not waterproof, you may have only a few adventures left in it. A repairist may be able to use fabric from an old tent in other repairs. 


Tent poles 

A bent pole or a loose shock cord (the bungee cord that runs through a tent pole) can make pitching your tent a headache. Here’s how to deal with those issues. 

Do it yourself

  • You know that tube that comes with your tent poles? Keep it! It’s a splint to hold damage in place and reinforce wonky poles. You can duct tape it to secure it for a field fix.
  • If your shock cord wears out, you can fix it as long as the end pieces of your poles screw off of the pole and you have small vice pliers or even a friend with good hand strength around. 
    • Ensure the cord has enough stretch left to tie a knot.
    • Tie the knot low on the loose shock cord. When you finish, the pole should fold back up similar to when you got it — the cord needs to have more tension than when you started, but not be too tight. 

Find a Repairist

For damage beyond loose shock cords, consult a repairist. It's a good idea to take care of this as soon as you get home, since broken tent poles can really mess up a backpacking trip!


Sleeping pads

There’s nothing worse when camping than waking up on the cold ground because of a hole in your sleeping pad. Luckily, they’re relatively easy to fix! 

Do it yourself (or ask a friend for help)

  • Fill a spray bottle with a solution of soapy water. Blow up your pad, then spray the solution all over it while you’re outside on a sunny afternoon. Have a friend help you roll your pad and squeeze air around. You’re looking for bubbles appearing on the pad’s surface. These indicate a hole in the pad!
  • Mark any holes with a Sharpie and fully rinse and dry your pad
  • Once dry, use sealant or adhesives to fix the holes.

Find a repairist

  • If you can’t find any holes, you may have a leaky valve. Contact the brand to see if they have solutions for this or else you may be out of luck.

Move on

If you determine the sleeping pad is totally busted, the material can be used by someone crafty. see if a creative reuse store or repairist can use it; it's great, durable fabric.


Takeaways on keeping your gear functioning

Outdoor gear is meant to be heavily-used out in an unpredictable environment, so if you rip, tear, bust or break your gear, it just means you're using it right! Keep it going for years with good maintenance. Kay also mentions that GORE has a lifetime warranty on any product with GORE in it (think GORE-Tex). Contact them directly for the warranty process.

Keep it clean

  • Rinse your tents and packs. Especially after coastal adventures around salt water, desert dryness, sunny mountain tops; saltwater is very corrosive and even some light spray can damage metal if left on.
  • Wash your down gear with proper down-safe products.
  • Wash your waterproof gear with proper technical fabric products and re-DWR every other season.

Fix it yourself

  • Use Tenacious tape fixes when you're out in the field; duct-tape can damage gear if you let it sit too long.
  • Make a gear first-aid kit. Include: Tenacious tape, safety pins, dental floss, a needle, small tube of tent sealant, rubber bands or hair ties.

Find a repairist For...

  • Zipper replacements or repairs
  • Durable sewn patches, stitching and reinforcements
  • Alterations and modifications for fit and performance
  • Seam tape repair or advice
  • Sleeping bag/down garment laundering service

Responsible disposal or upcycling

Ultimately, there are times that something is just not repairable anymore, and that’s OK, it just means you’ve been using your gear for what it’s made for! There are a few possibilities for your totally worn out stuff. 

  • Contact the brand to see if they'll replace it under warranty. They may also have repair coverage or service, replacement options, parts and pieces. GORE offers a lifetime warranty for any product with GORE in it (think GORE-Tex).
  • Remake your busted jacket into a fanny pack (or ask a crafty friend to do it).
  • Bring your item to a gear consignment shop (listed below). If a consignment shop can't take it, try going to a repair shop or creative reuse center to see if they can salvage any materials.
  • Donate your shoes (but make sure they’re still in decent shape if you do this — no holes or thin soles). If they're not fit to wear, clean sneakers or tennis shoes can be dropped off at select Nike stores (see Shoe Care section).
  • Donate your socks to a recycling program like Material Return to be made into yarn and thread for new products.
  • Encourage your favorite brands to build on their recycling and reusing programs as well as providing feedback on design.

Where to fix gear, find it used, or recycle it

Get your Gear Fixed Professionally

DIY+: Supplies to DIY and how to learn more

  • Gear Aid: Products for DIY repairs and laundry products for technical apparel
  • Nikwax: Laundry products for technical apparel
  • Summit Selvage: DIY classes, repairs, community (Seattle)

Upcyclers and Recyclers

Used Gear Stores

Find more shops that rent or lend outdoor gear.